TO A CRISP

crispy crunchy cod

LASDI©

Every Tuesday is Fish Night at Vintağe!  We love our home so much and feel quite fortunate to live in it.  And we especially love it when we can enjoy a meal by the bay window that overlooks our backyard - when it's too hot to sit outside for dinner!  We avoid being carried off by Texas-sized mosquitoes, and also avoid cooking ourselves to a crisp! 

With that in mind, this to-a-crisp fish recipe is the perfect spring-to-summer food because it is light and flaky, and gives a nod to the heat outside while staying cool inside!

This is a lower-carb crunch, and also gluten-free!  I paired it with crispy brussels topped with almonds, and quinoa with crispy garlic chips and even garnished with homemade crispy onion rings to greatly define this theme of To A Crisp!  Enjoy!  And stay cool...and crisp!

CRISPY CRUNCHY COD

4 cod filets

6 eggs

1/2 cup gluten-free panko

1 cup almond flour

1/4 cup grated parm

2 tbs garlic powder

1 tsp sea salt

1 tsp ground black pepper

1 tsp old bay or fish seasoning

dash (or two!) of cayenne

Preheat your oven to 400°F and line a baking sheet with parchment paper.  Crack the eggs in a bowl and whisk lightly so the yolks and whites are completely blended but not frothy.  (see notes)  In another bowl, combine the remaining ingredients.  Lightly press your fish with a paper towel to eliminate any excess moisture. Line everything up as follows: fish, egg mixture bowl, breading bowl, parchment-lined baking sheet.  With your left hand place the fish in the egg mixture, making sure it is entirely coated.  Place the fish in the breading bowl, taking care not to touch the breading with that hand.  With your left hand, roll the fish in the breading, gently pressing into it to make sure it is entirely coated and then place it on the baking sheet.  Continue this process until all filets are done.  Bake for 20 minutes or until the fish has reached a safe internal temp of 145°F. (see notes).  Crunch away into the crisp!

NOTES: Whisking the eggs lightly will ensure no trapped air bubbles, which can cause your breading to not stick to the fish during the heating/cooking process.  Have patience...it's worth it!  Remember that because the breading is almond flour and gluten-free bread crumbs, it will have a paler or lighter brown exterior.  Take heed not to overcook to try to get it to a darker color.  It will still be crisp!  If you don't want to turn on the oven in the warmer weather, the air fryer is your friend here!  You will only need about seven to ten minutes of cook time for crispy, crunchy goodness!

LOVE BIRD

LASDI ©

We don't really celebrate Valentine's Day at Vintağe.  I mean, we DO, but we don’t REALLY. There are several reasons.  One, we celebrate our love for one another EVERY DAY!  No need to pick out one day in particular to prove it as far as we're concerned.  Second, a traditional Valentine’s with all the gifts, roses, candy, and the like, seems like frivolity for our finances.  Now that doesn't mean we don't love love, and we think the world of people who DO celebrate the day!  And being the Themer I am, February means an entire month of wearing red, hearts, and cooking in theme, too!  

This particular meal was definitely dedicated to the Love of My Life, The Hubster.  It was simple, but tasted complex, easy, yet tasted as though I'd been cooking all day!  

Being the low-carb girl of The Fam, I made the rice with bean pasta shaped like rice for the low-glycemic effect, but you can use regular arborio rice or even brown or long grain!  The key here is to make the meal with love, present it with love, and LOVE IT when ya eat it, no matter WHAT time of year it is!

LOVE BIRD

4 slices bacon (see notes)

extra virgin olive oil (evoo)

4 chicken breasts

sea salt, pepper to taste

1 red bell pepper, chopped

1 onion, chopped

1 stick butter

1 cup parmesan

1 cup heavy cream

1 lb cooked rice of your choice

1 large jar of roasted red peppers in water

1/4 cup heavy cream

Preheat oven to 350, put bacon on a baking sheet, and cook to desired doneness (see notes).  While the bacon is cooking, heat a heavy pan (I use my cast iron!) until lightly smoking.  Salt and pepper chicken on both sides, sprinkle a little evoo into the pan and carefully add the breasts.  Keep on medium-high heat and sear until caramel brown, about four minutes on each side.  Remove from the pan and set aside; remove bacon from the oven and also set aside.

Add chopped onion and pepper to the pan and lower heat to medium.  Cook until slightly translucent and a bit of brown starts to show.  Sprinkle it with a little sea salt and pepper and stir.  Meanwhile, add butter to a medium-sized saucepan on medium heat.  Once melted, add parmesan and the cup of heavy cream, stirring until combined.  Add your cooked rice and stir.  Remove onion/pepper mixture from the pan and add to the rice mixture, gently folding until combined.  Place in a warmer to thicken to a risotto-like consistency and to stay warm until you're ready to plate.

Add the roasted red peppers and jar water to the chicken pan on medium heat, and cook on high until the water has evaporated.  Remove from heat.  With a hand blender, carefully blend until the peppers have a thick consistency.  Add the 1/4 cup heavy cream and blend again.  Place the pan back on medium heat and add your seared chicken breasts to the pan.  Allow to come to a slight boil, flip the chicken breasts and cook another few minutes until tender.

Plate your rice, then gently place your chicken on top using a small spoon to pour some of the sauce in the pan on top.  Place bacon on top of the chicken.  I also used a red pepper to top the whole thing with a "heart", but that's totally optional!  

Enjoy this rich meal with a glass of rosé and dedicate it to the love of YOUR life, too!

NOTES: I use uncured bacon with no nitrites or nitrates, which can intensify the flavor.  Don't use smoked bacon of any kind in this recipe as it will change the flavor profile.  I also put the bacon in the shape of a heart before putting it in the oven to go along with the theme!  Then I lay the red pepper heart on top for added HEART!

SUMMER BLUBES

LASDI©

Y'all.  Texas is HOT.  Especially in the summer.  But it's not hot enough to give me what's referred to as "the summer blues".  Oh, no!  Not when fruits like blueberries are in peak season!  

I go all Bubba Gump when it comes to those Summer Blubes...I use them for infused water, as a sauce for a light fish dinner, as a topping for salads for lunch...and as a main ingredient in this amazing brekkie recipe!  

As the low-carb girl in The Fam, I make my own glycemic-friendly carbohydrate-controlled pannycakes, but you can use whatever your favorite stackable flapjack may be!

Good for breakfast, lunch, OR dinner, this recipe is a game-changer when it comes to beating the heat during the Summer season!

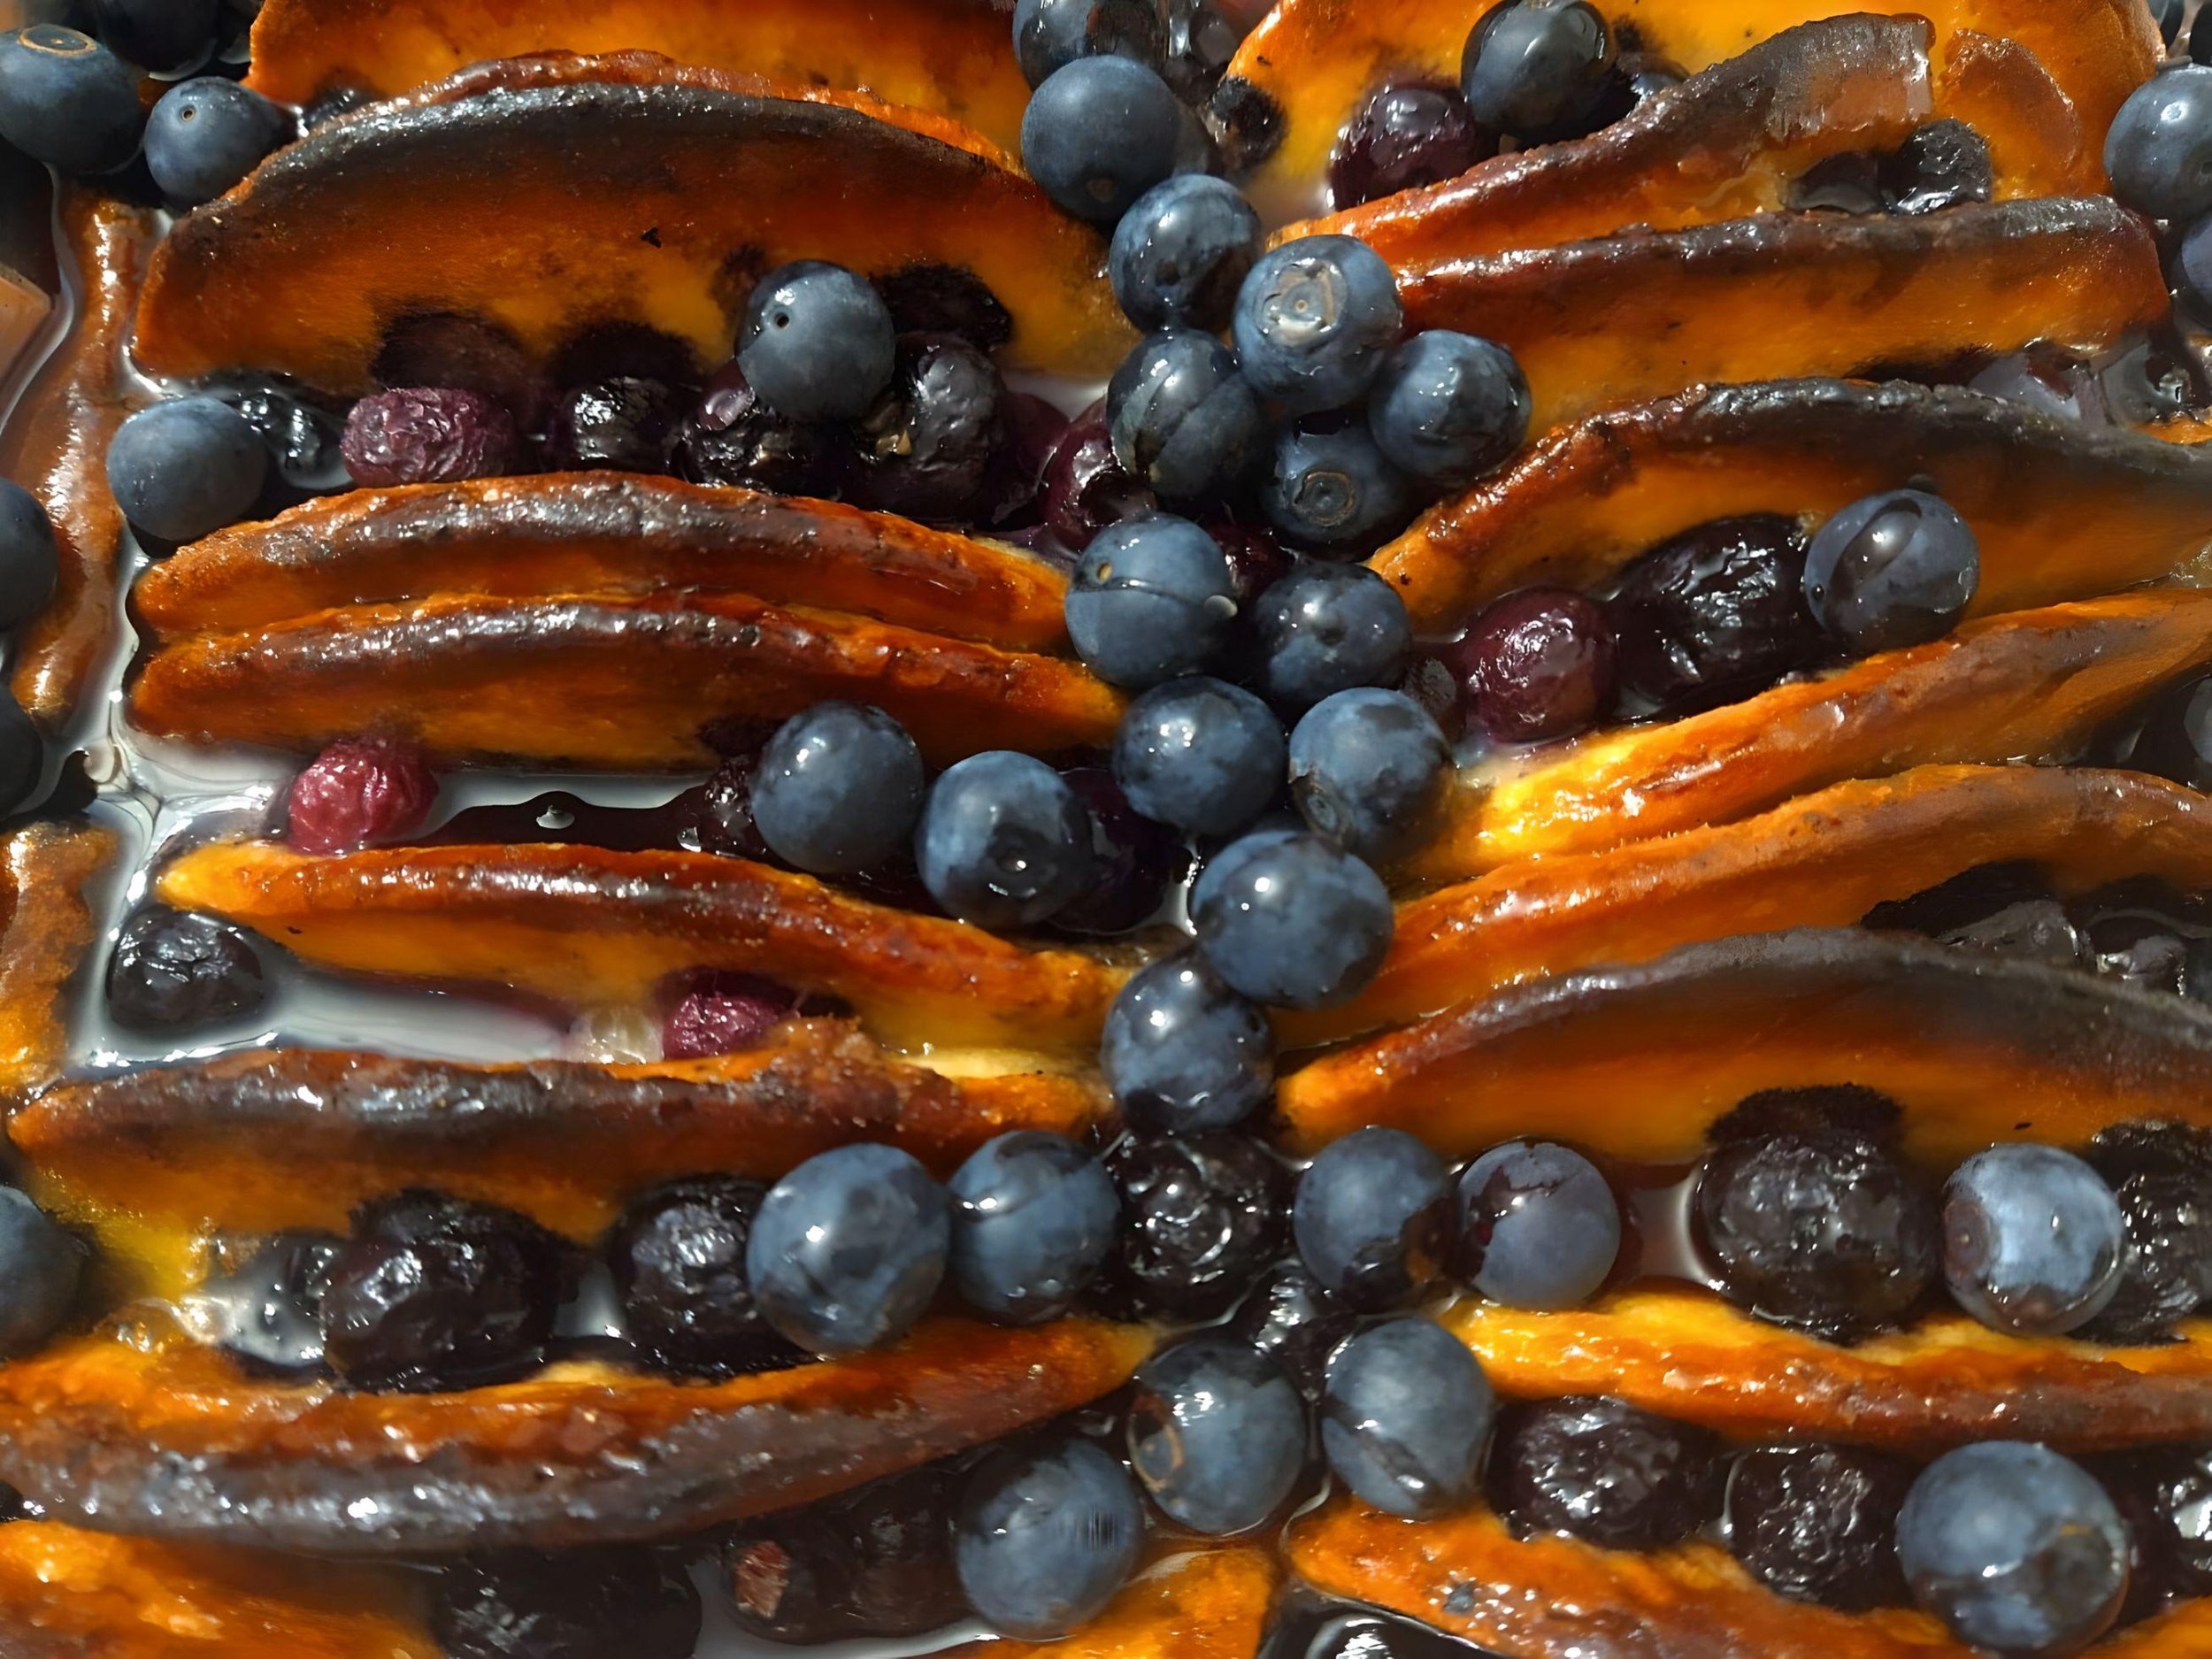
BLUEBERRY PANCAKE BREAKFAST CASSEROLE

20 (ish) pancakes (see notes)

8 eggs

2 cups almond milk

1/2 tbs ground nutmeg

1 tbs vanilla

1/2 cup maple syrup (see notes)

2 cups fresh blueberries

Fold each pancake in half and place fold-side-down in a lightly-greased casserole dish (I use my glass 9x13), stacking them next to each other in rows, allowing them to overlap each other if necessary until the entire dish is filled with the pancakes and they can stand up on their own.  

Whisk together the eggs, almond milk, nutmeg, vanilla, and half the maple syrup in a medium-sized bowl, saving the other half for later.  

Carefully pour the egg mixture over the pancakes.  Cover with cling wrap or foil and place in the fridge for a minimum of thirty minutes, and a maximum of overnight, or about eight hours (see notes).  Remove from the fridge and pour half the blueberries over the eggs and pancakes, making sure they get into the nooks and crannies!  Place in a 375-degree preheated oven and cook until the egg mixture is set and the middle doesn't jiggle!  

Allow a few minutes to cool, then drizzle the remaining syrup and blueberries over the top before serving.  Then chase the blubes away with every bite!

NOTES: The recipe calls for about twenty pancakes when I make it, but you can certainly make a few extra to ensure the dish gets filled.  Save any extra for the chef!  Not only can you use any pancake you like in this recipe like high-protein, buttermilk, or even banana, you can even use waffles instead!  Or all of the above!  If you are using low-carb pancakes or waffles, forego the fridge and bake immediately, as they tend to disintegrate in the egg mixture if they sit too long.  I use carb-friendly syrup, but feel free to go crazy and use blueberry syrup to kick it up a notch!

SMARTER TARTAR

LASDI©

Who says you have to do what you're told?   Though necessary for a civil society, structure, rules, and law is not always what's called for in life!  An example?  Tartar sauce!  That's right!  TARTAR SAUCE!  We've been taught a few things about this cool condiment:

it is for fish only

it isn't for vegetarians or vegans

it's probably not good for you

dinner time is the only time

Guess what?  Today we are breaking all the rules when it comes to tartar sauce!  I have a recipe that is fast, easy, and delicious with some variations that can make it edible for all!  And since you control the ingredients, there is no need to worry about compromising your health with preservatives and synthetic additives!

I know my Vegetarian Friends are thinking, "Tartar sauce is for FISH!  I don't EAT fish!"  Well, guess what?  This recipe is so tasty AND versatile, we use it for french fries, tofu bites, and grilled veggies.  For the Vegan Peeps, you're probably thinking, "That's all well and good, but I don't EAT mayo, and tartar sauce is mayo-based!"  Yes, Darlings, for the most part, that's true.  But in this case, you can swap the mayo for vegan mayo, or even go for a silkier, protein-packed version with silken tofu!  Meat Eaters!  You have not been forgotten!  The Hubster and I have used this sassy sauce for chicken, turkey, and even steak tartare!  YES!  Tartar TARTARE!

It’s sure great for dinner, but believe me when I say this is great for a lunchy chicken salad, or a brunchy egg casserole topping!

For the hot month of June here in Texas, and to celebrate the ocean theme this month brings, we actually DID use it for "the best fish sandwich I've ever had!” to quote The Hubster.  Of course, being the low-carb girl I am, we used soft low-carb buns that were flat-top toasted and served alongside some home-made coleslaw (that I plopped a dollop of the sauce on top of, too!), and we were in palate paradise!

So go ahead, Ladies and Gents, break the rules!  Dissolve the myths!  Take five minutes and make this sauce for the foodie freedom you deserve!

LASDI©

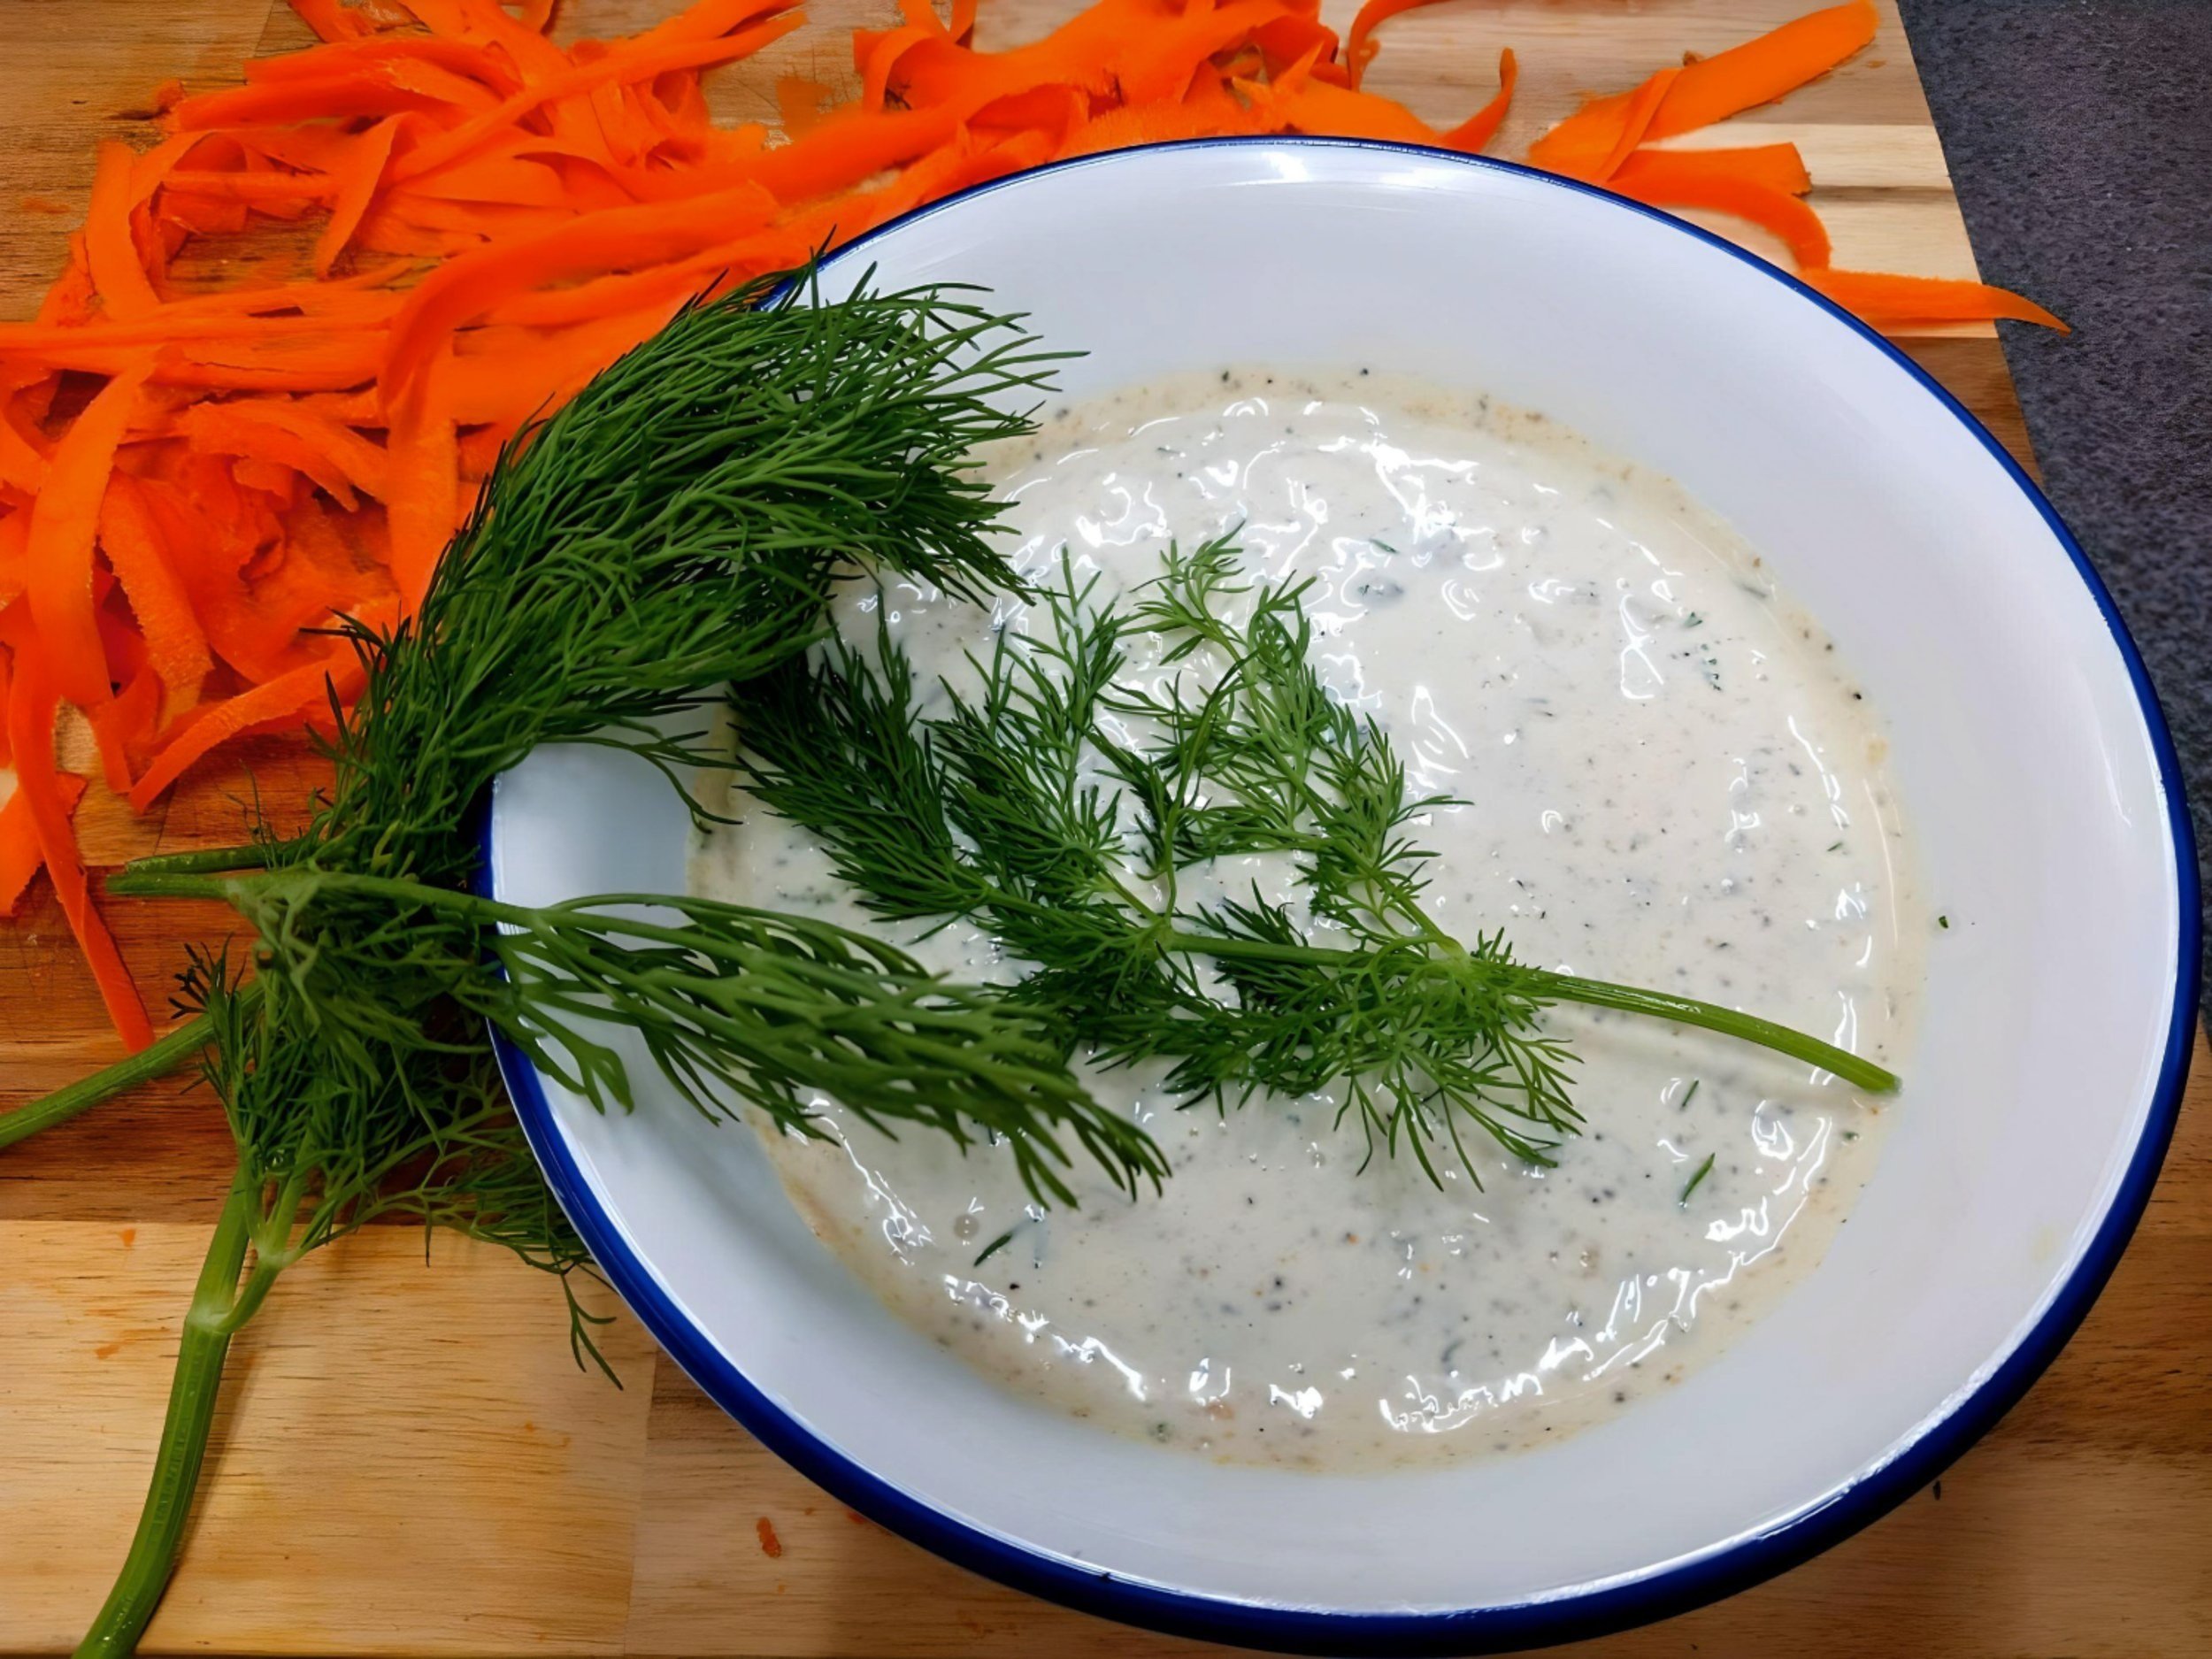
TARTAR SAUCE

1 cup mayo (see {IMPORTANT} notes)

1 tsp dijon mustard

1 tbs dill pickle, chopped (or dill pickle relish)

3 tbs capers

1 1/2 tsp lemon juice

2 tbs dill, chopped (see notes)

1 tsp garlic powder

sea salt

cracked black pepper

Combine all ingredients in a bowl, and let sit in the fridge for at least ten minutes to marry.  Serve cold or room temp.  (see notes)

NOTES: As noted above, vegans can easily swap vegan mayo or silken tofu for the mayo in this recipe; however, THE QUALITY OF THE MAYO YOU USE IS CRUCIAL!  You cannot use salad dressing (like Miracle Whip) as a swap here.  I use Duke's and Duke's only!  You can certainly use dry dill for this recipe, but you probably won't get the clean pop fresh dill offers.  Refrigerate immediately unless used right away.  In order to use it at room temp later, take it out about ten minutes prior to using it to allow to warm up a bit.  This sauce will stay for up to a week in a sealed container in the fridge!  But you won't have to worry about that.  Even if you double the recipe, it will all be eaten up with no leftovers to spare!

YA SCAMP!

ShrmipScampi

LASDI©

Life As She Does It is a quadrant of talents that can be used to make life easier.  One of the quarter pieces is being a boutique caterer.  It even makes my own life easier!

I had a business lunch meeting, which to me means business would be discussed at a meeting where we ate (obs), but I would be in charge of the LUNCH!  It only made sense! It’s a way I control the ingredients AND get to show off a little cooking prowess!

I wanted something hearty-yet-light, delicious, and EASY!  I went with shrimp scampi pasta, and it was truly all of those things!  It was also a nod to the goodbye to February with the gorgeous red-hued shrimp that when paired with another makes the shape of a heart, and hello to March with the green of the broccli gems I added!  

I  had a lot to do to prepare for the meeting itself, so this had to be as simple as possible to put together, but taste complex as though a michelin star chef had prepared it!  

I'm sharing it with you because this would make a great brunch, lunch, dinner, or snack!  Ya scamp!

SHRIMP SCAMPI PASTA

1 box spaghetti (I use low-glycemic pasta for the low-carb effect!)

1 head broccoli, cut into bite-sized pieces

high-heat oil (hho), like avocado

4 cloves garlic, minced

1 pound shrimp, peeled, deveined, (tails on for that classic scampi feel!)

1-750 ml bottle of sauvignon blanc (see notes)

1/4 cup lemon juice

1 1/2 sticks butter

sea salt, to taste

course black pepper, to taste

1 tbs paprika

1 tsp garlic powder

parsley, minced

Cook pasta according to instructions (see notes).  During the last minute of cooking, add your broccoli.  Strain and rinse all with cool water to stop the cooking process.  Leave in the strainer, and heat a heavy skillet (I use my cast iron!) on high heat for about two minutes or until slightly smoking.  Add enough hho to just barely cover the bottom.  Add your shimp (see notes) and cook for about one minute on each side.  Remove from heat and set aside.  In the same pan you made your shrimp over medium-high heat, add the wine.  Let it reduce to about half, add the lemon juice and bring to a simmer.  Add your butter, one pat at a time, whisking whilst  you work until it's all melted and the sauce seems thickened and slightly frothy.  Add your seasonings and let simmer for another thirty seconds or so, and remove from heat.  Place pasta / broccoli mix into a large bowl, add your shrimp and pour scampi sauce over.  Mix gently with tongs until pasta, shrimp, and broccoli are coated.  Sprinkle with parsley and you're ready to eat!

NOTES: Buy two bottles of the sauvignon blanc...one for cooking, one for drinking!  You can use any white wine you like, but there is something about sauvignon blanc that lends a crisp, light taste. Be sure you salt your pasta water BUT GOOD!  It will not only flavor the pasta, but in this case, the broccoli as well!

POLAR EXPRESS

PLAR EXPRESS

LASDI©

It is a fairly well-known fact that I am a themer.  Not just a theme here and there!  Oh, no!  Pretty much everything I do has a theme, expecially when it comes to my cooking.  January in Texas is not easy to keep with the cold theme for obvious reasons, so I create my own chill!  Polar Express is a meal I serve up for my Weekly Meal Prep clients every January, but also to The Hubster!  It's one of his absolute favorites with the creamy, dreamy polar mayo sauce on top of fish, usually for us pangasius fish, and served with milky scalloped potatoes and white pepper cauliflower.  Since I'm the low-carb girl, I eat mine sans the potatoes, and I don't feel like I'm missing a thing!  It's all about the warmth the chill of the polar express fish brings!

POLAR EXPRESS FISH

4 pangasius filets (or any fish of your choice)

sea salt to taste

pepper to taste

8 tbs mayo (I prefer Duke's!)

1/2 tsp sea salt

2 tsp course black pepper

2 tsp garlic powder

1 tsp coriander powder

1 tsp polar sauce (soy sauce or even liquid aminos)

Preheat oven on broil.  Season fish on both sides with sea salt and pepper to taste (see notes) and place on a prepared baking sheet.  In a small bowl, mix the remaining ingredients and spoon about two tablespoons of the mixture over each filet.  Gently spread the mixture to coat the entire filet and place under the broiler for six-to-eight minutes, or until the sauce just starts to melt, bubble, and brown.  Serve over your favorite veggies!

NOTES: Remember that polar, soy, or amino sauce is a salty flavor, so salt your filets lightly.  Make sure to use a wide enough spatula to remove from pan and serve so that the delicate fish doesn't break!

BRINE & WINE - MIGHTY FINE!

LASDI ©

Every year I cook one heckuva turkey for Thanksgiving! The fascinating part is that I believe it gets better with each year! No, I mean it. Each year The Fam says it is the best turkey yet. And then they say it the following year, and they're right!

Much like I am always interested in trying harder to be a better person with each day, and developing a recipe for excellence in my life, I do the same with my food - especially the coveted Thanksgiving turkey!

I have learned the key to the juiciest bird - BRINE, BRINE, BRINE! It's easy, and totally worth it. I have included my specific brine recipe below, but want you to know that betwixt immersing that giant poultry into its flavorful baptism and the beautiful carvings by The Hubster placed on your plate, I also create one of the very best white wine gravies you wilL ever put in your mouth! Wine, wine, wine! Yes, Yes, Of course other things take place, like slathering tons of herbs and butter between the skin and the bird and blasting it with 500 degree oven heat for the first hour of cooking, but the end result from the first step and the last step are what truly make the turkey incredible.

So for the sake of your day of giving thanks, allow me to share what everyone seems to THINK is a SHEcret!

God bless you all, and a very Happy Thanksgiving to you for this holiday and every day!

SHE'S TRADITIONAL TURKEY BRINE

15 - 18 lb turkey

2 gallons gallon of water

2 cups kosher salt

2 cups dark brown sugar

10 bay leaves

2 tbs whole black peppercorns

1 pkg fresh rosemary

1 pkg fresh thyme

1 pkg fresh sage

1/2 cup star anise

1/4 cup whole cloves

2 pbs juniper berries

In a clean bucket or insulated cooler, add one gallon of water, salt and sugar and stir until dissolved, about 2 minutes. Place your washed turkey (to which you have already taken out the neck and innards), and submerge into the container. Pour enough of the remaining water to cover the turkey, add your herbs and spices. Gently poke them down a time or two to submerge in water briefly. If you are using a bucket, place in the fridge; if using a cooler, cover with a light layer of ice. Brine for one-to-three days, consistently putting another layer of ice if it melts if using a cooler.

Remove from brine prior to cooking, and pat both inside and outside dry with a paper towel. Cook however you like!

WHITE WINE GRAVY

1/2 stick butter

2 shallots, minced

3 tbs all-purpose flour

1 small bottle white wine (I use sauvignon blanc)

1 32 oz container chicken broth

1 tsp white pepper

1 tsp garlic powder

1 tsp onion powder

sea salt & pepper, to taste

On medium heaT, melt butter in a large stock pot. Add shallots and cook until just turning brown on the edges. Add flour and stir. Cook for about a minute-and-a-half, stirring constantly. Add a tiny bit of wine, about a half cup, whisking while pouring. Once the mixture becomes thick, add another half cup, whisking while pouring. Once thickened. Pour a little chicken stock into the pot, also whisking while pouring. Lower heat to a simmer, add spices, and whisk every so often until it thickens. Add a splash of white wine and a splash of chicken stock, interchanging until desired consistency. Pour over turkey. Or straight into your mouth after it cools. Drink remaining white wine from a vessel of your choice! Happy Thanksgiving!

PLUMERIA

plumeria

LASDI ©

Remember when you tried to grow your bangs out, and there was that weird time where they were too short and not quite long enough? That’s how I feel about September. It’s not really Summer anymore, and yet, it isn’t Autumn just yet. But with the purple primrose, bluebells, and thistle growing wild along the highway, stonefruit in the full throws of its season, and the indecisive thermometer doing its own thing, September carries its own lovely label when it comes to food!

This meal carries it’s own uniqueness in that it uses turkey cutlets as the protein. The caramelized plums & purple onion take your palate to a different level, and serving it with roasted beets with crushed pistachios and warm citrus vinaigrette, as well as rosemary barely-smashed potatoes makes this meal one of the best September could offer! And just to add some more seasonal color, the potatoes were the baby potatoes with gold, purple, and red skins. BEAUTIFUL!

So go ahead and grow those bangs out…as long as you do it in September!

PLUMERIA

4 turkey cutlets (see notes)

2 tbs extra virgin olive oil (evoo)

sea salt, to taste

pepper, to taste

avocado oil (or some other high-heat oil)

4 plums, pitted and sliced

2 large purple onion, sliced

1/2 tsp clove

1 tsp brown sugar

1 cup broth of your choice

Set your oven to high broil. Place your cutlets together in a bowl and pour the evoo over them. Sea salt and pepper to taste and toss, coating each cutlet evenly. Place on a sheet pan and shape into a circle (see notes). Place under the broiler for five minutes, until lightly browned on top. Turn off the oven, allowing the cutlets to stay in there to rest as the oven cools down. Heat a heavy pan (I use my cast iron skillet!) on high heat until it is lightly smoking. Sprinkle enough avocado oil to cover about half the bottom of the pan, and lower your heat to medium. Carefully pour your onion into the pan, stir to cover with the oil, and let sit untouched for about two minutes. Sprinkle them with sea salt and pepper, and add your plums. Stir slightly so as to mix together and let cook for another two minutes. Sprinkle with the clove and brown sugar, stir and pour a slight bit of broth into the mix, then stir again. Allow to cook together until the broth is absorbed, continuing this process until all the broth has been used and the onion and plum have become a beautiful purple color, and has thickened, about ten-to-twelve minutes. Remove your cutlets from the oven and serve with a heaping helping of the plum-and-onion mixture on top.

NOTES: If you can't find turkey cutlets in your local grocery store, you can use turkey tenderloin or even chicken. If using the turkey cutlets, know that they come in a very weird shape, so pulling the two ends together on the sheet pan to form it into a circle will make them cook into that shape! They look very whimsical this way, especially once the vibrant mixture is on top! Perfect for Date Night at home, too!